Showing posts with label how-to. Show all posts

Thursday, June 21, 2012

Styled by B+B


This piece must be prefaced with a huge MERCI to the wonderful model and great sport in these photos: my brother <3  Richard was a huge help by allowing me to dress him up, fuss with his hair, even add a touch of contouring bronzer!  What a champ- I love this kid <3  Merci, mon frère préféré hehe

For these looks, it is no surprise that I was inspired by European fashion.  My biggest source of inspiration was not the latest Resort 2013 shows and their audiences, but rather the crowds that I saw when I went to the Summer Fancy Food Show 2012 in Washington, D.C. on Tuesday and saw the outfits being worn by exhibitors, vendors, and perusers alike found in the European aisles.  To narrow it down a bit further, I was intrigued most by the France and Italy aisles.  They had that sleek, modern, but comfortable look that I adore.  There is a small exception in this series, though, because one of the looks was actually inspired by the Valentino Men's Collection that I reviewed yesterday.  On such a hot summer day, I did not make him wear the coat in the Valentino look for long, so there aren't as many pictures of it.  All in all, Richard is a champ and I really appreciate him helping model these looks for me <3


First look:
Look 1 is inspired by parisian street style <3  The scarf is actually mine from my visit to Paris a few years ago- the light blue and white are so bright that it is perfect for summer!

Shirt: Royal Blue Classic V-Neck from H&M  ~  Jeans: Low Loose Fit from American Eagle  ~  Shoes: Black Oxfords by Nunn Bush  ~  Scarf: sky blue and white houndstooth from a street market in Paris <3
Sunglasses: silver aviators from H&M


Second Look:


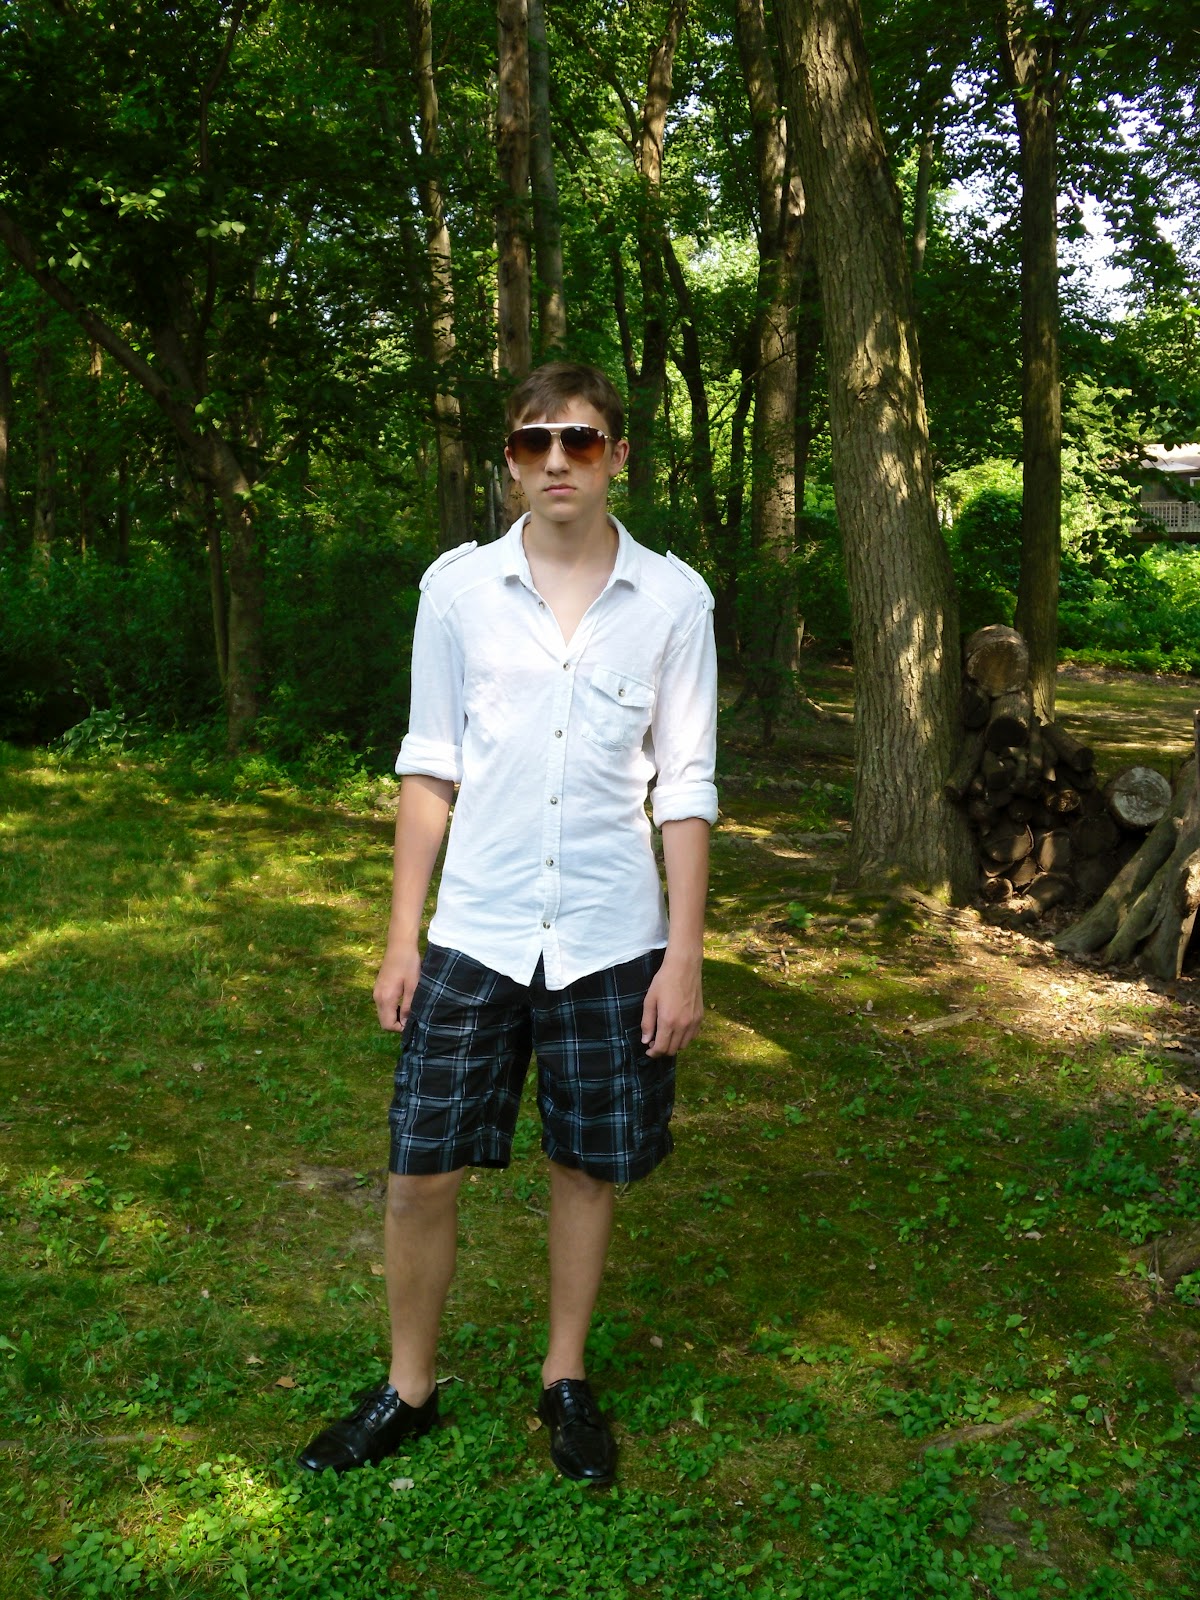
This look was more inspired by the italian aisle of the SFFS12, but it also has a bit of a Marc Jacobs feel to it with the wide, knee-length, plaid shorts (the wide leg making them look kilt-esque!).  A casual white button down is great for guys in the summer because it looks and feels light.  The black and white plaid shorts, black sleek shoes, and white and gold aviators add classy touches and an elegant summer cool.  I also swapped out the aviators for a pair of horn-rimmed glasses, which change the feel of the outfit.  With the horn rimmed glasses, the look is less Marc Jacobs and more business casual.


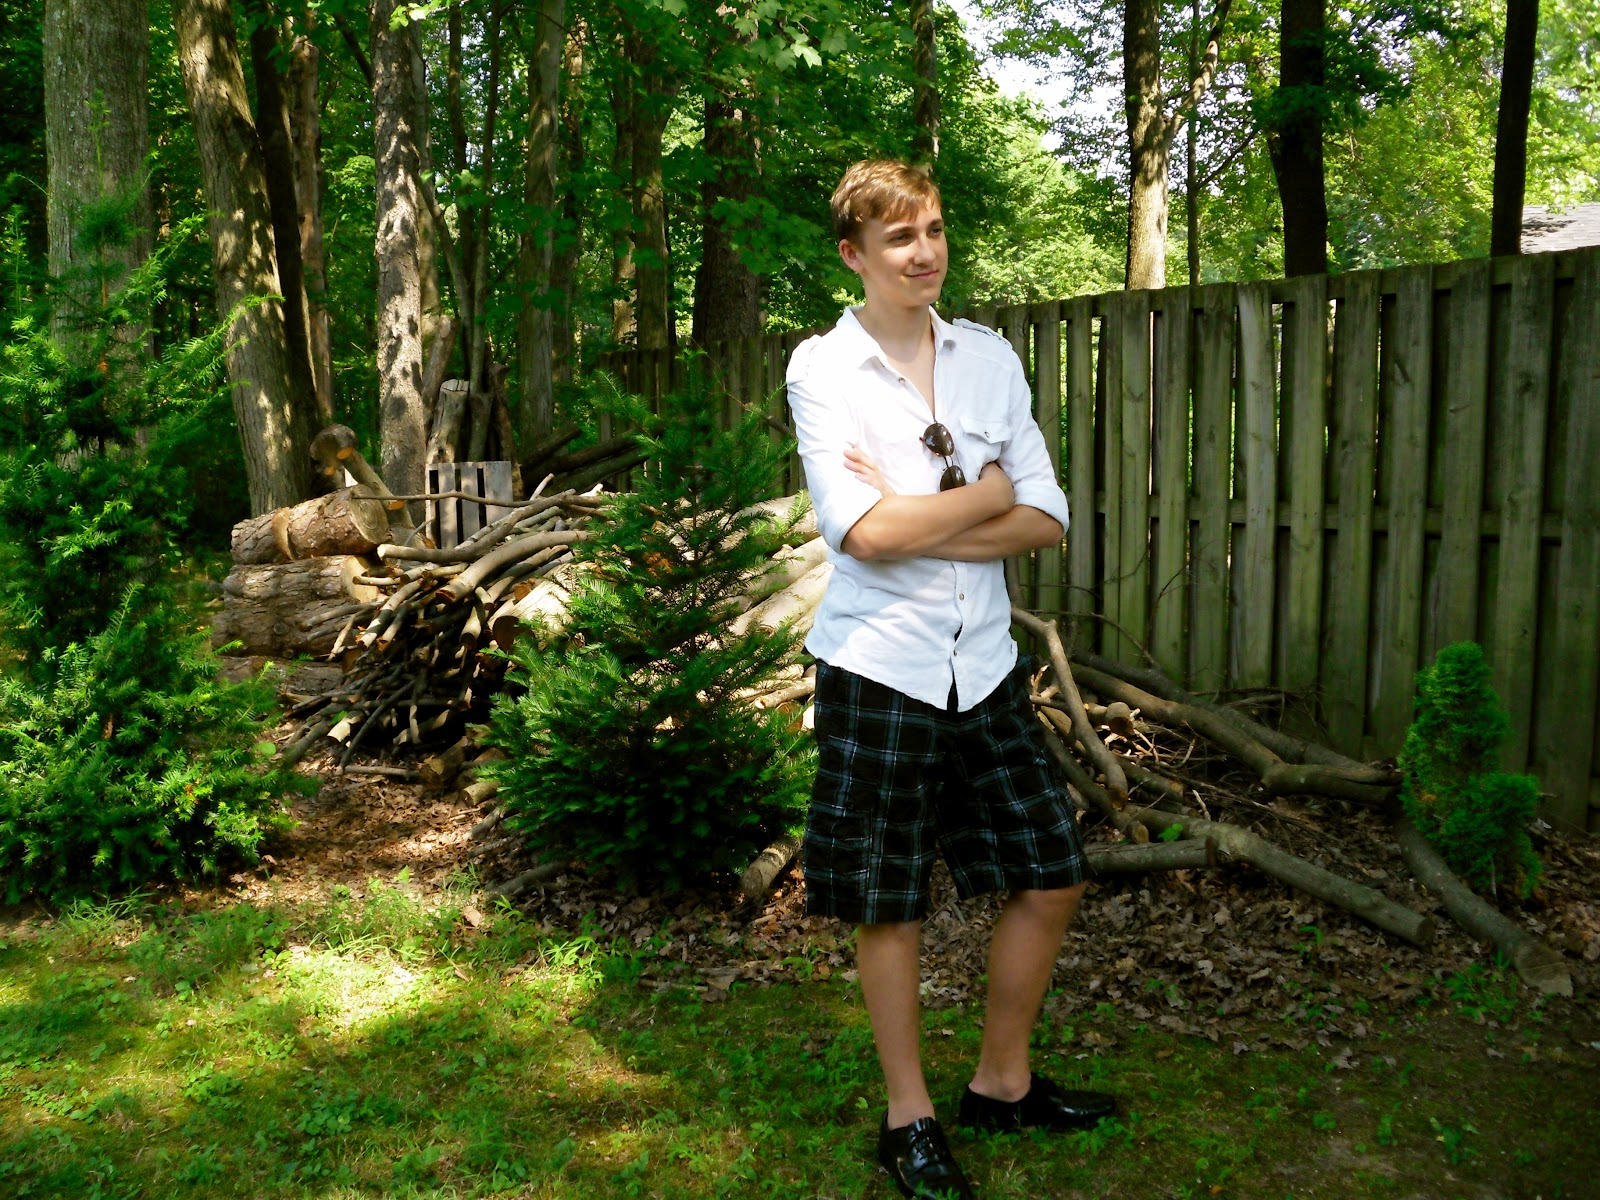
Shirt: white cotton button-down from H&M  ~  Shorts: white on black plaid  ~  Shoes: (same)  ~  Sunglasses: gold and white aviators from Urban Outfitters  ~  Glasses: horn rimmed glasses from Target


Obviously, I am all about this fabulous jumping pose <3  Perfect to showcase the whole look!


Third Look:

This look was most certainly inspired by Valentino's Men's Collection for Spring/Summer 2013!  Played up this camo jacket by layering it over the white button down and switching the plaid shorts for these khaki ones.  Of course, I kept the slick oxfords!  Did we achieve the Valentino SS13 look?  :)

Shirt: white button-down from H&M  ~  Shorts: khaki knee-length  ~  Same Oxfords  ~  Same UO Aviators and Target Glasses  ~  Jacket: vintage Army Medic jacket from Good Will


Fourth Look: 

This look was inspired by italian street style.  The tucked in button-down, slick accessories, light hues, and then pop of color with the looped scarf would make any guy appear put together without sacrificing comfort - especially considering this warmer weather!  If it continues to be this hot, feel free to ditch the scarf haha


Shirt: blue button-down "Oxford Vintage Fit" from American Eagle Outfitters  ~  Shorts: khaki knee-length  ~  Same Oxfords  ~  Sunglasses: same silver H&M aviators  ~  Scarf: colorful striped scarf in a european loop from a street market in Morocco


 Fifth Look:

This look is a very casual, but very french look.  While most french would not wear a 'Moulin Rouge' T-shirt, that is just for a little dramatic emphasis to help with the look ;)  But the soft black T, clean khaki bottoms, and [a common tool throughout these looks] slick accessories give the effortless yet polished look that the french seem to achieve on a regular basis.

Shirt: 'Moulin Rouge' T-shirt from a street vendor in Paris, FR  ~  Shorts: khaki knee-lengths  ~  Same Oxfords  ~  Same Target horn rimmed glasses  ~  Same classy, good sport of a brother <3


I cannot thank Richard enough for being such a good sport and such a fantastic model for this photoshoot!  Let me know what you think of the looks (or if you enjoy my goofy brother as a model? haha) and any other responses or questions by clicking on the 'Comments' pencil below and posting in the white comments box!

Merci et bonne journée <3


Styled by yours truly ;)

B+B

Tuesday, March 6, 2012

Pastel Polish: A Different Take on Color Blocking

Chances are, if you've been flipping through the latest edition of your favorite fashion magazine, then you've heard about the huge trend that is Color Blocking.  This trend is one to be carefully executed, for fear of looking like you belong on a teaching mat in a kindergarten classroom.  I find the best way to work into this trend is to incorporate one solid color and work into adding up to four other colors.  Balance and accessorize with a neutral color, black, or white, and stick to one type of metallic with your jewelry.

Now, because it is getting into spring, I decided to experiment with my own fresh take on color blocking.  Instead of sticking with basics from the color wheel, I used pastels!  And here's how:


First, I picked my five colors for the base:
  • Pastel Purple: Revlon (325 Gum Drop)
  • Pale Pink: Fresh Paint (Pom Pom)
  • Mint Green: *obscure polish from Israel that my friend has*
  • Light Yellow: Pure Ice (Excuse Me)
  • *Goal was Robin's Egg Blue*: Sally Hansen (The Real Teal)
Next, I found a neutral to act as the constant that ties together all of the nails:
  • H&M Nail Polish (Beige)
My extra thin detail polish brush is missing, so I used a black sharpie for the definition.


Here's how you can achieve the same look:
  1. Prep nails: file, buff, smooth, and wash hands
  2. Apply one base coat of clear nail polish and allow time to dry
  3. While that is drying, decide the order in which you'd like to paint your nails (organize the bottles so that you maintain your decided pattern
  4. Apply one coat of polish in your decided order (for fun, I did the opposite order on each hand)
  5. Allow your nails enough time to dry (this will depend on your polish)
  6. Apply a second coat of the polish to your nails
  7. Allow the second coat time to dry
  8. Very carefully, use the neutral to create a semicircle along the cuticle so that the flat side is against the base of the nail
  9. Now, allow the nails to dry completely (this may mean a few hours, so make sure you have a nice book to read or homework to type!)
  10. Once the nails are completely dry, use a fine tip polish brush with black nail polish (or, if yours has gone missing like mine, use a black Sharpie!) to outline the beige semicircle, but only along the rounded edge (not the edge against the cuticle)
  11. Allow the polish/Sharpie time to dry completely
  12. Apply two coats of your favorite clear, sealing top coat to help your look last!
Please let me know what you think, if you've tried it, or any other questions/comments/responses that you have  in regards to this post and color blocking by writing in the box below

Thanks ~ Bisoux!

Friday, February 3, 2012

Winged Eyeliner


 Recently, I had the extra time (and extra sleep!) to be able to do this look: the winged eyeliner.
For this look, I used the BH Cosmetics gel liner in Onyx, and N-Y-C pencil liner, and a little Rimmel Mascara.
After doing my foundation/coverup routine (to achieve a slightly dewy look, while controlling the shine), I applied the gel liner with a liner brush, starting with a narrow line at the inner corner and gradually thickening towards the outermost corner of the eye.  Next, I use the liner brush to make a small line making about a 120degree angle away from the nose and on the horizontal line of the eyes.  I then connected the tip of that small line to the center of the top lashline and filled in any open space within the triangle.  Once the gel line was complete (touchup with a moist Q-tip or moist wipe/tissue folded to a sharp point) I used the black N-Y-C pencil liner to trace along the waterline of the lower lashes- all the way to the innermost corner of the eye.  And last, with the mascara, I applied one coat to the top lashes and a gently pressed the bristles of the mascara wand to the base of the outermost lashes on the bottom lashline.  Of course, after I was done applying makeup, I touched up any areas around the eye where things might have smudged, made sure my foundation was still in tact, and applied chapstick.  And voilà: my best winged eyeliner yet!


If you would like to see a video tutorial for this look, or have anything to say/questions to ask in response, please share it in the comments section below.
Thanks!


Bisoux <3


**because the makeup is so glam, I decided to do fun hair as well: a sleek ballet bun on the top of my head fastened with bobby pins and flyaways kept in place via my eyebrow brush and a teensy weensy spritz of hairspray ;) **

Rehydrating Your Skin


Here is how I like to do a hard-core rehydration of my skin. I it is really a problem, do this before bed and apply your favorite richer hydrating cream instead of daytime face lotion, and preferably one that contains natural oils and lipids as opposed to being mainly chemical-based.

Quick Party Nails


I am in love with the quick-glam crackle nail polish!  It is perfect for a self-done mani before going out at night when you are busy and running around on a university-life student schedule!